
Ingredients
The pastry layers
- 500 gplain flour
- 250 gcold butter, cubed
- or 200 g lard
- 1 teaspoonsalt
- 2egg yolks
- about 150 ml cold water
- 1 tablespoonwhite vinegar
- or lemon juice
The filling
- 1.2 kgdulce de leche
- thick, spreadable consistency
- or 3 tins condensed milk
- cooked into dulce de leche
- see the safety note
- or bought dulce de leche
To finish
- icing sugar, to dust
- or the crushed trimmings
- of the baked pastry layers
- a little ground cinnamon
- optional
Equipment
- a rolling pin
- a 24 cm plate or ring, to cut around
- baking paper
- several baking trays
- a wide flat plate to assemble on
Directions
- Check the water level every twenty minutes. Top it up with boiling water when needed. Never open the tin while it is hot. Let it cool completely in the pan first. That cooling takes several hours. Pour the condensed milk into an oven dish. Cover the dish tightly with kitchen foil.
- Set it in a roasting tin of hot water. Bake at one hundred and sixty degrees. Bake for about ninety minutes until brown. Whisk it smooth once it has cooled. Or simply buy ready-made dulce de leche.
- Make the pastry in a large bowl. Rub the cold butter into the flour. Work quickly with cold fingertips. Warm hands melt the butter into the flour. Rub until it looks like coarse breadcrumbs. Do not let it go past breadcrumbs. Add the salt and stir it through. Beat the egg yolks with the water and vinegar.
- Add the liquid gradually to the flour. Mix with a knife rather than your hands. Stop as soon as it comes together. Wrap it and chill it for thirty minutes. Or into more, if you want more layers. Keep the pieces you are not using chilled. Now roll each piece out very thin. Roll it directly onto a sheet of baking paper.
- Roll it as thin as you possibly can. Cut around a plate to make a neat circle. Keep the trimmings, since they are used later. Prick the circle all over with a fork. That stops it puffing up in the oven.
- Heat the oven to one hundred and eighty degrees. Bake each circle for about eight minutes. It should be pale golden and completely crisp. Bake several trays at once if you can. This step takes a long time otherwise. Bake the trimmings too, on a separate tray. They are extremely fragile when warm.
- Let all the layers cool completely. Check the dulce de leche consistency. It should be thick and spreadable. Put the first pastry layer on a flat plate. Spread a thin even layer of dulce de leche. A thin layer is important rather than a thick one.
- Spread it right out to the edges. Lay the next pastry circle on top. Press down very gently to settle it. Continue alternating pastry and filling. Finish with a pastry layer on top. Do not put filling on the very top. Crush them with a rolling pin in a bag. Scatter the crumbs over the top of the cake.
- Press them gently onto the sides too. Chill it for at least six hours. Use a sawing motion rather than pressing down. Cut thin slices, since it is very rich. It keeps four days in the fridge.
Technique
- Never boil an unopened tin of condensed milk without keeping it fully covered with water. If the pan boils dry the tin can explode and throw boiling caramel across a kitchen; there are documented serious injuries. Check the water every twenty minutes, top up with boiling water, and never open the tin while hot. The oven method — condensed milk in a covered dish in a water bath at 160 degrees for about ninety minutes — is safer, and buying ready-made dulce de leche is safer still and is what most bakeries do.
- Chilling the assembled cake for at least six hours is not optional. The pastry absorbs moisture from the filling and softens from crisp to tender, which is the whole point. An unchilled cake shatters and slides apart when cut.
- Spread the dulce de leche thin. Too much filling makes the cake collapse and makes it sickly, and thin layers are what give the characteristic count of pastry sheets.
- Roll the layers as thin as you possibly can and prick them all over. Thickness is the enemy here, and a layer that puffs will not stack flat.
- Do not let the layers brown deeply. Pale golden is right; dark layers taste bitter through the whole cake.
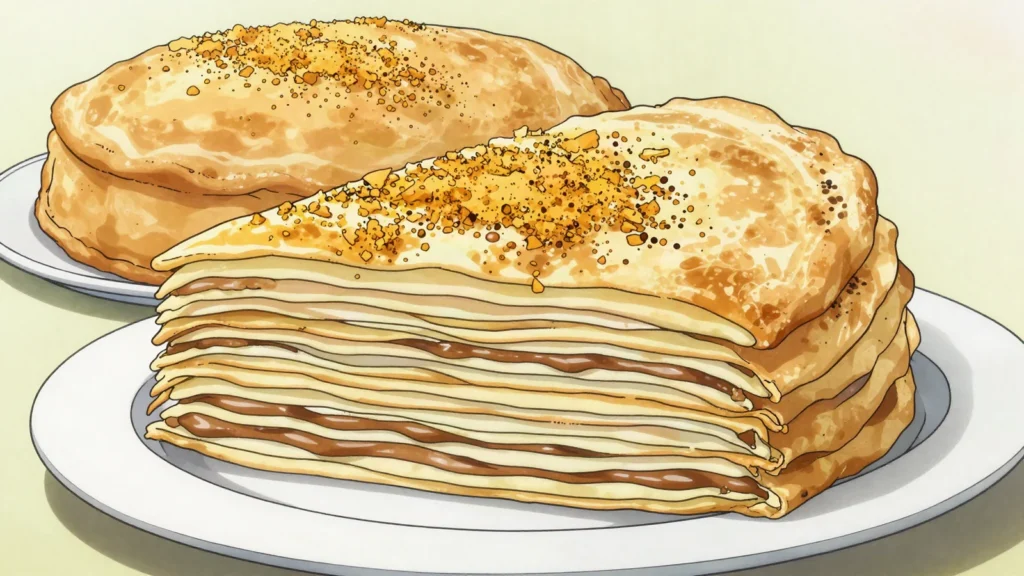
- Save and bake the pastry trimmings. Crushed and scattered over the top and pressed onto the sides, they are the traditional Costa Rican finish.
- The name means Chilean cake and the cake is Costa Rican. Chile has a related cake, torta de mil hojas, and how the Costa Rican name arose is not established — several stories circulate, none with documentary support the atlas could find. It is recorded as unexplained rather than resolved with a guess.
- Cut with a long knife in a sawing motion. Pressing down squashes the layers together.
Substitutions
- Bought dulce de leche replaces homemade and is what most bakeries use. Argentine and Colombian brands are widely sold.
- Manjar, the Chilean name for the same product, is identical.
- Lard replaces some or all of the butter in the pastry and gives a shorter, more traditional layer.
- Ready-rolled puff pastry replaces the homemade layers for a much quicker version; the texture is flakier and less crisp, and it is closer to the Chilean mil hojas.
- Lemon juice replaces the vinegar in the pastry.
- Icing sugar dusted over replaces the crushed pastry crumbs as a finish, and both are seen in bakeries.
Variations
- Torta de mil hojas is the Chilean relative, usually built from bought puff pastry sheets and cut into squares.
- French mille-feuille is the European ancestor of the whole family, filled with pastry cream rather than dulce de leche.
- Some Costa Rican bakeries make a version with a thin layer of jam alongside the dulce de leche.
- A version with chopped walnuts pressed onto the sides is made in some bakeries.
- Peruvian and Argentine layered dulce de leche cakes belong to the same family under their own names.
- Some households make a smaller square version, easier to assemble and to cut.
History
Costa Rican despite its name, sold by the slice in bakeries and built from a dozen or more wafer layers.
Frequently asked questions
What is Torta chilena?
Torta chilena is a dessert from Costa Rica: many thin pastry layers stacked with dulce de leche between them. Costa Rican despite its name, sold by the slice in bakeries and built from a dozen or more wafer layers.
How long does Torta chilena take to make?
Torta chilena takes 1 hour plus chilling of preparation and 1 hour of cooking. The recipe makes serves 12. It is rated hard to make.
What can I substitute in Torta chilena?
Yes, within limits. Bought dulce de leche replaces homemade and is what most bakeries use. Argentine and Colombian brands are widely sold. Manjar, the Chilean name for the same product, is identical. Lard replaces some or all of the butter in the pastry and gives a shorter, more traditional layer. Ready-rolled puff pastry replaces the homemade layers for a much quicker version; the texture is flakier and less crisp, and it is closer to the Chilean mil hojas. Lemon juice replaces the vinegar in the pastry. Icing sugar dusted over replaces the crushed pastry crumbs as a finish, and both are seen in bakeries.
What is the most important thing to get right in Torta chilena?
Check the water level every twenty minutes. Top it up with boiling water when needed. Never open the tin while it is hot. Let it cool completely in the pan first. That cooling takes several hours. Pour the condensed milk into an oven dish. Cover the dish tightly with kitchen foil.